Top Page
Detailed Manual
* The image is HDL-RA2TB.
HDL-RA2TB
Network Audio Server
Please also use [Manual search] on the upper right.
You can search by specifying the terms in this manual.

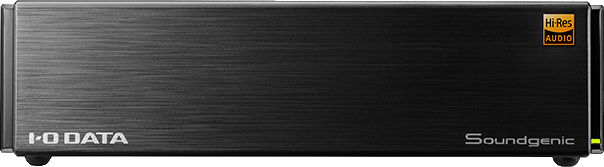
![]()
HDL-RA2TB
Network Audio Server
* The image is HDL-RA2TB.
* The image is HDL-RA2TB.
HDL-RA2TB
Network Audio Server
You can search by specifying the terms in this manual.

Total solution of Digital Music Experience
It is a network audio server designed for all people who are interested in network audio, inheriting the functions and usability cultivated by "fidata HFAS1 series" designed to explore to enjoy high resolution sound source.
It has media server function customized for audio, USB-DAC compatible, CD ripping function, it provides one stop from capturing music to playing and protecting.
This unit is a network audio server that streams music to a network audio device through a home network.
You can save audio files from the Internet or locally-stored audio files on this unit, and enjoy the music on a network audio device.
In addition, you can use this unit as a network audio player by connecting a USB-DAC or LAN DAC to it.
- This unit has been designed and manufactured for individuals to enjoy music. Please do not use it for business use.
- Please only use this unit indoors; it is not for outdoor use.
Those who have knowledge about connecting and setting network audio.
The instruction manual of this unit includes the following.
The precautionary items described here are intended to ensure safe and correct use of this product, and to prevent harm to users and damage to property.
Please be sure to follow these precautions when using this product.
 WARNING
This indicates a risk of death or serious injury if this precaution is not followed.
CAUTION
This indicates a risk of injury or damage to surrounding items if this precaution is not followed.
 Prohibited
 Follow instructions
WARNING |
Do not repair, alter, or dismantle this product. It could cause a fire or electric shock, burn, or failure. |
|
When you hear thunder, do not touch this product or the AC adapter. It could cause a fire or electric shock, burn, or failure. |
|
Do not place items that interfere with heat dissipation near this product. It could cause a fire. |
|
Do not allow foreign matter (such as liquids or metal) inside this product. Do not allow liquids such as coffee, or metal items such as paper clips, to enter the interior of this product. |
|
Do not connect while it is broken or malfunctioning. Be sure to remove all devices if this product is broken or malfunctioning. If you use it as it is, it could cause a fire, electric shock, or breakdown. |
 |
Stop use immediately if smoke comes out, or there are any strange smells or sounds. If you use it as it is, it could cause a fire or electric shock. |
|
Keep small parts of this product (such as screws) out of the reach of children. If they are swallowed accidentally, they could cause suffocation or block the stomach, etc. |
|
Be sure to turn off the power to the personal computer, peripheral devices, and this product, and remove the plug from the electrical outlet before installing, removing, or moving this product. You could get an electric shock. |
|
Do not use this product in places that are wet or have a lot of moisture. If water or detergent is applied to this unit, it could enter the inside through gaps and cause a fire or electric shock. • Be especially careful when using in a bathroom, in rainy weather, during snowfall, at the seashore, or near water. • Do not put anything containing water (a cup, vase, etc.) on or near this unit. • Do not touch this product for any reason if it gets wet. |
|
Do not use any AC adapter or power cord other than those specified or supplied with this product. The power cord could emit smoke or cause a fire. |
|
Do not connect the included AC adapter or power cord to any other devices. It could cause a fire or electric shock. |
|
Do not use near items that have high heat or moisture retaining properties, such as rugs, sponges, cardboard, or polystyrene. It could cause a fire. |
|
Do not place cords or wires near heating equipment. The coating of the power cord could be damaged, causing a fire or electric shock. |
|
Do not place anything on the power cord or AC adapter, or otherwise pull, bend, place pressure on, or alter them. Do not use the power cord in a twisted or bent state. |
|
Only connect to AC 110 V (50 Hz) electrical outlets. There is a risk of fire or heat build-up. |
|
Do not pull on the power cord when pulling out the power plug. Hold on to the plug and pull it out. The power cord could be damaged, causing a fire or electric shock. |
|
Do not connect to a loose electrical outlet. Ensure the power plug is firmly inserted all the way into the electrical outlet. If there is still looseness even after the plug is fully inserted, do not connect the plug to the electrical outlet. Heat could build up, causing a fire. |
|
Remove the power plug from the electrical outlet immediately if it emits smoke, or if there is a strange smell or sound. If you use it as it is, it could cause a fire or electric shock. |
|
Clean around the electrical outlet on a regular basis. Plugs left inserted in electrical outlets gather dust, which can cause heat retention and other effects that can cause a fire. (Tracking phenomenon) |
|
Use power strips within their rated capacity, and do not overload them with multiple plugs and extensions. If a power strip’s rated capacity (described as 1500 W, for example) is exceeded, the power strip could overheat and cause a fire. |
CAUTION |
Do not step on this product. It could cause damage or injury. Be especially cautious of small children. |
|
Do not put this unit in an area where the wires go through a place that people pass through. If someone trips on a wire it could cause an injury. |
|
Do not touch a fixed spot on this product continuously for a long time. This product may feel hot when it is used for a certain amount of time. |
Displays the status of this unit.
Green light
Power is on
Green blinking light
Starting up and stopping, During the setting process, Recognizing music CD
Red light
Error
Orange light
The internal software can be updated
Orange blinking light
The internal software is updating
Unlit
Power is off
If the indicator is still lit in red, it is probable that the internal disk error, the USB HDD is not found, and USB HDD (for backup) capacity is insufficient.
Please turn off the power. Firmware update will start.
Do not stop the power supply until the indicator goes out.
Basically you can use either USB port without any problems.
If there is a problem with playback with USB-DAC, try changing the USB port.
When the power is on, push it for 1 second with a long, thin item such as a pin.
The following settings will return to the state at the time of purchase.
• IP address (DHCP on/off)
• Twonky Server database
• Contents of work folder for CD import
Please visit our web page for the latest operating environment. (in English).
For the operating environment of fidata Music App, please see the App Store / Google Play Store.
Please visit our web page for the latest specifications. (in English).
As of April 2019, I-O DATA controller app "fidata Music App" has released iOS / Android version.
Please install from the App Store / Google Play Store.
When the fidata Music App starts for the first time, it will guide you on how to install Soundgenic, select server and renderer (player), and how to use it.
Start the fidata Music App.
Since the terms of service are displayed, please read carefully and tap [Agree].
Tap Soundgenic.
We will guide you how to install this unit and proceed with it.
For installation, there is a detailed explanation in Install this Unit.
In this screen, select the server that displays music and tap [Next].
* The selected server will be "Selected Server".
The Selected Server can be switched later.
• Make sure Soundgenic is running.
• Confirm that "Soundgenic" and "your smartphone / tablet" are connected to the same Wi-Fi router.
Select the renderer (player) to play the song and tap [Next].
※ You can switch renderers later.
• Make sure Soundgenic is running.
• Confirm that "Soundgenic" and "your smartphone / tablet" are connected to the same Wi-Fi router.
• Check whether the USB-DAC / LAN DAC is correctly connected to the Soundgenic.
Check the selected server and renderer and tap [Next].
Basic operations will be announced. Please read them.
Tap "Viewing the detailed manual for information on how to import music".
⇒ Saving Audio Files of the detailed manual (this document) will be displayed.
The setting at the first start is completed with this.
Please saving audio files on Soundgenic and use fidata Music App.
Switching the Power On and Off
Connect the USB hub to "USB 3.0/2.0" or "USB 2.0" in the rear side of this unit.
Using the USB hub, you can connect each of the following devices to this product.
• USB-DAC
• USB HDD for share
• USB HDD for backup
• USB CD/DVD/BD Drive
* We recommend that you use a USB hub to be connected to an outlet.
* Up to three USB HDD for share can be connected. Other USB devices can be connected one at a time.
(Portable digital audio player (DAP ) is also included in USB HDD for share)
* When a USB hub is connected to the USB 3.0 / 2.0 port, you can connect up to two USB devices (the number of ports on the USB hub does not matter).
Connect the Soundgenic to a Wi-Fi router. It is used to operate Soundgenic with tablet etc.
Connect the fidata server to an electrical socket.
Push the power button and turn on the power.
Connect the fidata server to a network audio player. Provide mucics from the fidata server to a network audio player.
Connect a USB-DAC to the Soundgenic. You can use the Soundgenic as a network audio player.
* Soundgenic cannot use LAN DAC and USB-DAC together.
Connect a LAN DAC that supports Diretta to the Soundgenic. You can use the Soundgenic as a network audio player.
* Soundgenic cannot use LAN DAC and USB-DAC together.
You can connect two USB HDD units, one for share use and one for backup use.
By connecting a USB HDD that contains audio files to the Soundgenic and operating it, you can stream the music on the USB HDD as if it were saved on the Soundgenic.
And, you can copy them to the Soundgenic.
You can back up the music that was put on the Soundgenic to a connected USB HDD.
To make USB HDD for backup, registration operation is necessary.
Connect a USB CD/DVD/BD Drive to the Soundgenic.
You can import music to the Soundgenic, or distribute music.
Connect the Soundgenic to a Wi-Fi router.
It is used to operate Soundgenic with tablet etc.
Connect the supplied LAN cable to the LAN port of a Wi-Fi router.
Connect the LAN cable connected to a Wi-Fi router to the "LAN" on back of this unit.
Connect Soundgenic to the power outlet.
Connect the supplied AC adapter to "DC IN 12V" on back of the Soundgenic.
To prevent accidental removal of the AC adapter, we recommend using the supplied cable hook.
Please insert the cable hook into the hole on the left side of "DC IN 12V" and fix it after sandwiching the cord of the AC adapter with the cable hook.
* Depending on the direction of the cable hook, it may not be fitted well.
Please confirm that it is fitted well.
Connect the AC adapter to the electrical socket.
⇒ When connected to a power outlet, the power is turned on accordingly.
Next, switching the Power On.
Press the POWER button on the back.
⇒ The indicator blinks green, then lights up green, showing that the unit has started up.
Press the POWER button on the back for 1 second (Until the indicator blinking).
⇒ After the indicator blinking green, if the light goes out.
Do not unplug the AC adapter or turn off the power strip until the lamp turns off.
Next, connect with a Network audio player, a USB-DAC, or LAN DAC.
Connect the Soundgenic to a network audio player.
Provide tunes from the Soundgenic to a network audio player.
Connect a LAN cable (purchased separately) to the LAN port of a network audio player.
Connect a network audio player to a Wi-Fi router connected to the Soundgenic.
This is the minimum installation.
Besides, it can connect with USB-DAC, LAN DAC, USB HDD, USB CD/DVD/BD drive.
Connect a USB-DAC to the Soundgenic.
You can use the Soundgenic as a network audio player.
• Soundgenic cannot use LAN DAC and USB-DAC together. If both LAN DAC and USB-DAC are connected to Soundgenic, USB-DAC has priority.
• To connect an audio device equipped with a USB-DAC, connect it to "USB 3.0 / 2.0" or "USB 2.0" on the back side.
This is the minimum installation.
Besides, it can connect with network audio player, LAN DAC, USB HDD, USB CD/DVD/BD drive.
* Soundgenic cannot use LAN DAC and USB-DAC together.
Connect a LAN DAC that supports Diretta to the Soundgenic.
You can use the Soundgenic as a network audio player.
• Soundgenic cannot use LAN DAC and USB-DAC together. If both LAN DAC and USB-DAC are connected to Soundgenic, USB-DAC has priority.
• Soundgenic can use one LAN DAC. Soundgenic cannot select the LAN DAC to be used. Therefore, do not install multiple LAN DACs.
Connect an audio device equipped with a LAN DAC to a Wi-Fi router connected to the Soundgenic.
Tap [SYSTEM SETTINGS].
Set [Diretta] to [On].
Tap [CONFIRM].
This confirms the settings, and tap [SET].
Please wait for a while until the setting has finished.
When the front indicator is lit, this completes the setting.
This is the minimum installation.
Besides, it can connect with network audio player, USB-DAC, USB HDD, USB CD/DVD/BD drive.
* Soundgenic cannot use LAN DAC and USB-DAC together.
Connect USB HDDs to the Soundgenic.
As "for share", you can stream the music on the USB HDD as if it were saved on the Soundgenic. And, you can copy them to the Soundgenic.
Also as "for backup", You can back up the music that was put on the Soundgenic to a connected USB HDD.
* USB HDD can connect three "for share" and one "for backup".
• Connect a USB HDD to the "USB 3.0 / 2.0" or "USB 2.0" on back of the Soundgenic.
Connect a USB CD/DVD/BD Drive to the Soundgenic.
You can import music to the Soundgenic, or distribute music.
• Connect a USB CD/DVD/BD drive to the "USB 3.0 / 2.0" or "USB 2.0" on back of the Soundgenic.
Before removing the USB CD/DVD/BD drive, please remove music CD etc.
• When there is no eject button on the USB CD/DVD/BD drive
- Click the POWER button twice quickly.
(This function is only available when [Ripping Operations] is set to [Manual] in [USB CD/DVD/BD DRIVE SETTINGS] on the SET screen.)
- Select [Removal of the USB device] in [USB DEVICE SETTINGS] on the SET screen.
Copy audio files to a USB HDD from a computer. By connecting a USB HDD that contains audio files, you can copy them to the Soundgenic.
USB HDD
It corresponds to USB HDD with the following format format and capacity.
• FAT32 (up to 2TB)
• exFAT (up to 16TB)
• NTFS (up to 16TB)
PC
Those connected with the USB HDD above.
Audio files
You can get audio files by downloading from a music distribution site or ripping them from a music CD.
For details of the supported formats of audio files, please see Operating Environment.
You can insert the data DVD/BD containing the audio file into the USB CD/DVD/BD drive and copy tracks to the Soundgenic.
• All the data in the USB HDD is stored in the Soundgenic, including data other than music.
• Data is stored in the "import" folder of the Soundgenic.
• If data of the same name is included in the "import" folder of the Soundgenic, it is overwritten.
A sudden failure could corrupt any saved audio files and lead to a loss of data.
For details of this unit’s backup function, please see "Backing Up Music”.
Connect a USB HDD to PC.
Copy audio files from a computer.
Put audio files in data DVD/BD from a computer.
* Please connect only one USB HDD (for share). If you are distributing music by connecting USB HDDs (for share), please remove them all in advance.
1) Connect a USB CD/DVD/BD drive.
2) Insert the data DVD/BD into the USB CD/DVD/BD drive.
3) The indicator in the front keeps flashing until the data DVD/BD is recognized. Please wait for several seconds.
With fidata Music App you can select songs in USB HDD and copy them to Soundgenic. Please see Capture songs in USB HDD.
Tap [USB DEVICE SETTINGS].
Tap [Data import], and tap [NEXT].
Tap [IMPORT].
Tap [Yes].
| Storage | Total size | Number of contents | The time required |
|---|---|---|---|
| USB HDD* | 101 GB | 7387 | 56 minutes 24 seconds |
| Data DVD | 4.05 GB | 180 | 9 minutes 30 seconds |
* NTFS format, USB 3.0 connection.
Please remove the USB device captured by [USB DEVICE SETTINGS] → [Removal of the USB device] on the setting screen.
Audio files start to be copied to Soundgenic and the indicator flashes.
Please do not remove the USB HDD while the front indicator is blinking.
Confirm that the front indicator is lit.
Remove the USB HDD.
This completes the operation.
By connecting a USB CD/DVD/BD drive, you can import tracks on a music CD to the Soundgenic.
USB CD/DVD/BD drive
Music CD
Music is saved in wav format by default; however, it can be saved in FLAC format if the setting is changed.
Open the Settings Screen, select [ENCODE] - [Data Format] in [USB CD/DVD/BD DRIVE SETTINGS].
• The imported tracks are stored in the following location of this product.
contents > CD Library > [Artist name] > [Album title]
• Each track is stored with a title following the serial number. (Example: 01 [Track name].wav)
• Also, the artwork data file, "Folder.jpg", is stored in the same location.
* Used to supply music information in Folder.jpg format. You cannot open or copy this file using a computer, etc.
However, this file can be moved or deleted in fidata, so you can change to the desired configuration.
* If the target music does not have any artwork data supplied by Gracenote, the Folder.jpg file is not stored.
Push the POWER button and put the music of the music CD in the Soundgenic.
Insert a music CD into the USB CD/DVD/BD drive.
Press the POWER button of this product.
This starts importing tracks on a music CD. The indicator keeps flashing during the import process. Please wait a moment.
| Time required to import tracks on a music CD*1 | ||
|---|---|---|
| Condition 1*2 | Condition 2*3 | |
| Drive A | 8 minutes 32 second | 8 minutes 32 second |
| Drive B | 16 minutes 35 second | 16 minutes 39 second |
*1 A music CD of 70 minutes 5 seconds. The time values above are just standards. The importing time varies depending on the drive or media you are using.
*2 AccurateRip: On, Retry Process: On, Read Speed: High Speed, ENCODE: WAV
*3 AccurateRip: On, Retry Process: On, Read Speed: High Speed, ENCODE: FLAC, Compression: Normal
Open the Settings Screen, select [CD/DVD/BD DRIVE CONTROLL] - [Ripping Operations] in [USB CD/DVD/BD DRIVE SETTINGS].
The tray of the USB CD/DVD/BD drive is opened and the music CD is ejected.
• The music CD is ejected immediately, and the indicator lamp in the front is lit up red.
Either of the following are possible causes.
- The target music information is not found by Gracenote, and the system stopped importing tracks on the music CD.
Check that this product is connected to the Internet.
If it is connected to the Internet, it is assumed there is no music information for the music CD. If you want to import the music CD, select [GRACENOTE] in [USB CD/DVD/BD DRIVE SETTINGS] on the SET screen of this product, and set [Unregistered music] to [Retrieve].
- There is insufficient internal disk space in this product.
Free space of 3.5GB or more is required to import tracks on a music CD. Delete unnecessary files, and retry importing.
• When the music CD has been ejected, the indicator lamp in the front is lit up red.
Either of the following are possible causes.
- Some tracks were not imported due to dirt or damage on the music CD. Check the reading side of the music CD.
Also, check the tracks that were not imported.
- You have ejected media or removed the CD/DVD/BD drive during import processing.
Import processing was interrupted, so the indicator lamp lights up red.
The importing of tracks on the music CD is completed.
Operate fidata Music App and put songs of music CDs into Soundgenic.
Insert a music CD into the USB CD/DVD/BD drive.
Start the fidata Music App.
Tap on the left edge.
* When is not displayed in the left edge, flick the screen and switch the pane.
Tap a server status.
* If Soundgenic is not a selected server, please refer to Choose a selected server.
Tap [CD ripping operation].
Confirm / edit "Album" "Artist" "Artwork".
Tap [Option] and set "Format".
Please tap [Release all] and check only the tunes you want to rip.
Tap [Start ripping].
⇒ Importing (ripping) of music CD starts.
Capture in progress: taking in work
Waiting: Waiting for the start of capturing
Judging: AccurateRip judgment, FLAC conversion processing being done
OK: Acquisition is completed and AccurateRip also matched with others' result
AccurateRip NG: Acquisition completed but AccurateRip did not match others' result
NG: Failed to import
Please tap [Close] in the upper left and close this screen.
If you want to check the status of import, please open this screen again.
The tray of the USB CD/DVD/BD drive is opened and the music CD is ejected.
See The music CD has been ejected immediately, or the indicator lamp in the front has lit up red.
The importing of tracks on the music CD is completed.
By connecting a USB HDD that contains audio files to this unit and operating it, you can stream the music on the USB HDD as if it were saved on this unit.
USB HDD
It corresponds to USB HDD with the following format format and capacity.
• FAT32 (up to 2TB)
• exFAT (up to 16TB)
• NTFS (up to 16TB)
PC
Those connected with the USB HDD above.
Audio files
You can get audio files by downloading from a music distribution site or ripping them from a music CD.
For details of the supported formats of audio files, please see Operating Environment.
A sudden failure could corrupt any saved audio files and lead to a loss of data.
For details of this unit’s backup function, please see Backing Up Music.
It should be noted that this unit’s backup function will not backup the music stored on the USB HDD.
Connect a USB HDD to PC.
Copy audio files from a computer.
This is USB HDD (for share).
Indicator flashes.
Confirm that the front indicator has gone from blinking to lit.
⇒ You are now able to stream the music on the USB HDD as if it were saved on this unit.
* If you want to remove a USB HDD when the power to this unit is on, see Removing the USB HDD.
There are [usb1~3] folders in the same place as the [contents] folder. The files in these folders are the audio files on the USB HDDs.
* The [usb1~3] folders are read-only in order to protect the music (you cannot write to them or delete files in them).
2) Tap [USB DEVICE SETTINGS].
3) Tap [Removal of the USB device], and tap [NEXT].
4) Tap [REMOVE].
* When two USB HDD units are connected, choose one to remove, and then tap [REMOVE].
5) Confirm that the message [Remove completed.] is displayed.
6) Remove the USB HDD.
You can insert a music CD into the drive and distribute tracks on the music CD as if they were imported.
USB CD/DVD/BD drive
Music CD
This system does not support simultaneous play through multiple players.
Insert a music CD into the CD/DVD/BD drive.
Indicator flashes.
Check that the indicator lamp in the front has lit up.
⇒ Playing the wav file in this product.
Tracks on a music CD are displayed in the following location on DLNA.
Music > CD > #CD: [Album title]
Each track is displayed with a title following the serial number. (Example: 01 [Track name].wav)
* Tracks are also displayed under [Album] or [Artist] depending on the imported music information in the same way as for normal tracks.
Access this unit from a personal computer, and copy audio files to this unit.
PC
The PC is on the same network as the Soundgenic.
(PC connected to the same Wi-Fi router as Soundgenic.)
Audio files
You can get audio files by downloading from a music distribution site or ripping them from a music CD.
For details of the supported formats of audio files, please see Operating Environment.
This is an application to access Soundgenic.
Please access https://www.iodata.jp/lib/product/l/5160.htm, and install it on your personal computer.
Start [LAN DISK] on the desktop.
Double-click [Local].
Double-click [RA-xxxxxx].
Connect the personal computer on which settings are to be made to the same router as the one used by this unit.
Double-click the[contents] folder.
Please see I want to know about folders other than contents.
Save audio files in the [contents] folder.
Please see I want to know the folders in the contents folder.
Your music is now in Soundgenic.
This is an application to access Soundgenic.
Please access https://www.iodata.jp/r/6603.htm, and install it on your Mac.
Launch the Finder.
1) Click [LAN DISK].
2) Double-click [RA-xxxxxx].
Connect the personal computer on which settings are to be made to the same router as the one used by this unit.
Double click the [contents] folder.
Please see I want to know about folders other than contents.
Save audio files in the [contents] folder.
Please see I want to know the folders in the contents folder.
Your music is now in Soundgenic.
Move and organize music files in Soundgenic with fidata Music App.
Open file operation to use for moving music files etc.
Start the fidata Music App.
Tap on the left edge.
* When is not displayed in the left edge, flick the screen and switch the pane.
Tap a server status.
* If Soundgenic is not a selected server, please refer to Choose a selected server.
Tap [File operation].
File operation is displayed.
We will guide you through an example of how to move the music you ingested from the music CD to the folder where you normally saved the music.
In one side pane, tap [CD Library] → [artist name of music CD].
* For musics of imported music CDs, music files are saved in the following location of Soundgenic.
contents > CD Library > [artist name] > [album title]
On the other side of the pane, open the folder of the artist in the folder where you normally saved your music.
With file operation, you can operate music files on multiple servers that support file operation.
It is useful to check the folder of the artist name of the next higher hierarchy instead of the folder of the album title in the following procedure.
Flicking a pane allows you to return to the next higher level.
Check the folder with the same name as the imported album title and tap (move).
Tap (paste).
The checked folder moves.
We will guide you through an example of how to connect USB HDD with musics and capture only the necessary musics.
In one side pane, open the folder where you normally saved your music.
To create a new folder, proceed as follows.
1) Open the hierarchy for which you want to create a folder.
2) Tap (make).
3) Tap the pane you want to create a folder on.
* This operation is unnecessary in one pane screen (Smartphone / tablets portrait).
4) Enter the name of the new folder and tap [OK].
⇒ A folder has been created.
In the other side pane, tap the fidata server.
Tap [usb1~3] folder.
Check the folder containing the music file in the USB HDD and tap (copy).
Tap (paste).
The checked folder will be copied.
Delete audio files in Soundgenic with fidata Music App.
Delete audio files referring to Saving Audio Files from a PC.
Display audio files you want to delete.
Check audio file(s) you want to delete.
Tap (delete).
Tap [Delete].
⇒ The checked music file(s) will be deleted.
Edit meta information of music file with fidata Music App.
Extensions: wav, flac, dsf
Open the folder containing the music file.
Check music file to edit meta information.
You can edit items at once.
Tap (tag.edit).
Edit meta information.
Tap [Change].
Tap [Change].
⇒ Meta information has been changed.
fidata Music App can play iTunes musics of the installed terminal for playback.
In doing so, fidata Music App will act as a media server.
* iTunes music data on the cloud will not be displayed.
* iTunes music data with copyright protection is not displayed.
* If you are using "iTunes match" etc, please download the music from the cloud with music app.
* "Apple Music" service is not supported. Therefore, it will not be displayed even if you download it.
Start the fidata Music App.
Tap
Tap [fidata Music App setting ].
Tap [Media server].
Enable [Media server].
Tap [Close].
Alongside Soundgenic, "This device" is displayed.
After that, please select and play music like Soundgenic.
In the "control app" for network audio, specify the server and the renderer (player) and play music.
Start the control app.
* As of April 2019, we have fidata Music App for iOS / Android version.
For play musics by fidata Music App, please see Play with fidata Music App.
In the control app, select "RA-xxxxxx" for the server.
* xxxxxx means 6 alphanumeric characters.
In the control app, select the renderer (player).
* If you are connecting the USB-DAC / LAN DAC and want to play from there, select "RA-xxxxxx".
xxxxxx means 6 alphanumeric characters.
Select musics in the Soundgenic with the control app and play them.
Play tunes using the fidata Music App as a control app.
Start the fidata Music App.
Operate the left pane (server pane) to display the tunes that you want to play.
fidata Music App has "Server pane" and "Play list pane".
On the tablet, both can be displayed.
On the smartphone, only one pane is displayed and can be switched by flick.
Here is an example that opens in order from the list of servers.
→
→
→
* To display the list of servers, please tap or flick the server pane to the right and return to the upper hierarchy.
Tap the shortcut to display the corresponding category in the selected server.
• Fix the shortcut order.
Please see I want to fix the order of shortcuts.
Please check the power and connections of Soundgenic.
It is also possible that the server is not selected. Tap the lower left corner and select [RA-xxxxxx] as the server.
Tap tunes.
⇒ Tunes are registered on the right side (play list pane).
* You can change the order of tune by dragging of the tune.
* If two panes are displayed, you can also register tunes by dragging of tunes (albums) in the server pane and dropping them onto the playlist pane.
Renderer (player) is not selected.
Please tap the lower right corner and select a renderer (player).
With this application function, you can make your device a renderer (player).
1) Tap .
2) Tap [fidata Music App setting ].
3) Enable [Media Player].
⇒ You can now select your device as a renderer.
4) Specify your device as a renderer.
⇒ You can play music on your device.
• For iOS version
Flick the tune to the left and tap Delete displayed.
• For Android version
Flick the tune to the left end.
(new)
Delete other tunes and register only the tapped music in the playlist.
Also, play the registered music.
(now)
Register tunes you tapped at the end of the playlist.
Also, play the registered tunes.
(next)
Register tunes you tapped after the tunes currently playing in the playlist.
(later)
Register tunes you tapped at the end of the playlist.
Tap (save) to save the current playlist as a local playlist in this application.
When you finish registering tunes, tap to play the tunes.
Tap .
Tune information and artwork are displayed large.
Please enjoy music.
fidata Music App can save the created playlist in the application.
We call it a local playlist.
Save the playlist displayed in the playlist pane as a local playlist in the application.
Make a playlist.
Tap (save).
⇒ The contents of the playlist are copied and the edit screen of the local playlist is displayed.
Tap the name of the local playlist and edit it.
You can change the order of the tune by dragging .
• For iOS version
Flick the tune to the left and tap Delete displayed.
• For Android version
Flick the tune to the left end.
Tap (save).
⇒ It is saved as a local playlist.
In the local playlist list, the local playlist from the previous time is added.
Load the contents of the local playlist into the playlist.
Tap .
Tap [Local playlist].
⇒ The local playlists list is displayed.
Tap the local playlist you want to import
• For iOS version
Flick the local playlist to the left and tap [Delete] displayed.
• For Android version
Tap .
Tap [Delete].
Tap (add).
⇒ The contents of the local playlist are loaded into the playlist.
When open a local playlist, all tunes are checked.
Check only the tunes you want to load, then tap (add).
Writes the contents of the local playlist to the Soundgenic as a playlist (m3u).
It is convenient for use with network media player.
* The playlist is saved in the playlists folder of Soundgenic.
Tap .
Tap [Local playlist].
⇒ The local playlists list is displayed.
Tap the local playlist you want to export.
Tap (m3u).
When opening a local playlist, all tunes are checked.
Check only the tunes you want to export, then tap (m3u).
Edit the file name of the playlist (m3u).
Select server to export playlist (m3u).
If tunes not included in the upload destination server are included in the local playlist, that tune will not be included in the playlist to be exported.
(When you export local playlists containing tunes A, B, C of Soundgenic tunes, fidata server tunes D, E, F to fidata server, only tunes A, B, C will be exported to playlist.)
Tap [Upload].
⇒ The contents of the local playlist are exported to the playlist (m3u).
1) [Soundgenic] → [Music] → [Playlists] in the server pane.
2) Tap the playlist (m3u).
⇒ Tunes are registered on the play list pane.
When the database of the media server is rebuilt, tunes that are different from the displayed tunes may be linked to each other in the local playlist.
In such a case, you can also add tunes to the playlist from the exported playlist (m3u) and save it as a local playlist.
In such a case, you can restore the local playlist by loading the exported playlist (m3u) and saving it back as a local playlist.
* The local playlist is linked with the music ID of the database. m3u is linking tunes in the folder structure of the media server. Therefore, as long as the position of the music file does not change, you can use it without problems.
fidata Music App can search for tunes.
Please enter keywords in the search field and search.
If the search field is not displayed, flick down the server pane.
Tap .
Tap [Local playlist].
⇒ The local playlists list is displayed.
Tap [Search by specifying criteria].
Tap Search criteria.
The last search result is displayed.
Tap (search).
Set search criteria.
In use occasional criteria, it is not to delete it, but it is disabled here.
And when you need it, you can use this criteria again by enabling it here.
Tap [< Search by specifying the conditions].
Tap [Search].
• Add search criteria
Tap [+].
• Delete search criteria
Tap the search criteria and tap [Delete this criterion].
• Change handling of search criteria
By tapping on [Option], you can select "All criteria are met." and "Any criterion is met.".
Search results are displayed.
The fidata Music App allows you to take music from your Soundgenic to your device.
With this feature, you can take out music and listen to it on your device, or play it on a renderer (player) at a friend's house.
Start the fidata Music App.
Display the album or music you want to take out.
Tap ︙ on the right of the list.
Tap [Take out to this device].
⇒ The Soundgenic will start downloading the music to the device. If you wait until the download is completed, the music has been taken out.
• Delete all
1) Tap .
2) Tap [fidata Music App setting ].
3) Tap [Delete all offline libraries].
⇒ The selected music will be deleted from the device.
• Delete the selected music
1) Tap [This device] → [Music] → [Offline Library].
* If [This device] is not displayed, see "Target Music of iTunes to be play" and enable [Media server].
2) Tap ︙ of the music you want to delete.
3) Tap [Delete from this device].
⇒ The selected music will be deleted from the device.
Connect the device from which you took out the music to the same network as the renderer on which you want to play the music.
Start the fidata Music App.
Tap the bottom right corner of the screen and select the renderer (player).
You can use this app's function to make your device a renderer (player).
1) Tap .
2) Tap [fidata Music App setting ].
3) Enable [Media Player].
⇒ You can now select your device as a renderer.
4) Specify your device as a renderer.
⇒ You can now play music on your device.
* The music format (format) may not be playable depending on the device/OS version you are using.
Music in formats that cannot be played will be skipped during playback.
Tap [This device] → [Music] → [Offline Library].
* If [This device] is not displayed, see "Target Music of iTunes to be play" and enable [Media server].
→
→
Tap the music to add it to the playlist and play it as usual.
reference: Play with fidata Music App
You can transfer musics by connecting a DAP to Soundgenic.
Connect a DAP to "USB 2.0" on the back side.
Please operate to transfer files.
• Screen image
Start the fidata Music App.
Display the artist or music you want to transfer.
Tap .
Tap [Transfer to USB].
(When multiple USB devices are connected) Select the DAP.
* Depending on the DAP, it is recognized as multiple USB devices in the main memory and microSD slot.
Please refer to Acquisition of songs in USB HDD and check the contents of usb 1~3 and decide which USB device.
Music is transferred.
You can check the transfer status as follows:
The indicator for transfer is displayed.
* If the indicator does not appear, the transfer is complete.
By default, it is set to transfer music to the "Music" folder of the DAP.
If you want to transfer to another folder, set as follows.
Tap .
Tap [fidata Music App setting ].
Tap [Transfer settings].
Set "transfer destination folder"
Tap [Close].
Spotify is a music streaming service that provides access to a wide variety of music genres from around the world via the Internet. You can use your smartphone or tablet as a remote control to enjoy Spotify music from a USB-DAC or other device connected to Soundgenic.
For more information, please visit https://spotify.com/connect.
* You need to subscribe to the Spotify Premium or Spotify Free service.
* Soundgenic and your mobile device must be connected to the same network.
* The Soundgenic renderer must be running in OpenHome mode.
Launch the Spotify app, select a song, and play it.
Tap .
Tap "RA-XXXXXX[DAC name]."
⇒ You can enjoy Spotify music from a USB-DAC or other device connected to Soundgenic.
* If you are playing music other than Spotify from a USB-DAC or other device connected to Soundgenic, the music playing will be stopped and switched when you start playback using this function.
* The service is subject to change without notice.
* The Spotify software is subject to third party licenses found here: https://www.spotify.com/connect/third-party-licenses.
Open the Settings screen to make various settings in this unit.
Please see Install fidata Music App.
Start fidata Music App.
Tap at the left edge of the screen and tap server status.
Tap [Device Settings].
The settings screen opens.
Search for "Magical Finder" in the App Store or Google Play Store.
Start "Magical Finder".
Tap [RA].
Connect the terminal on which settings are to be made to the same router as the one used by this unit.
Tap [Open Setting Website].
The settings screen opens.
When you are placing a lot of tunes and worrying about the free space, use this method to check.
Please delete any unwanted music.
* Please back up music to your computer or another HDD unit.
Tap .
Confirm "Internal disk capacity / Internal disk space".
Also Confirm "USB disk".
You can check the free space.
Start fidata Music App.
Tap at the left edge of the screen.
Check free space.
Please see Check on the setting screen.
You can check the free space.
You can back up the musics in the built-in disk of Soundgenic to a connected USB HDD (for backup).
By connecting the USB HDD to the Soundgenic and registering the USB HDD for backup, you can back up the music.
* The music stored on the USB HDD is not backed up.
Any change to the music stored on this unit will be reflected in the automatic backup.
Add music
Music is backed up to a USB HDD for backup.
Deleting music
Music stored on a USB HDD for backup is not deleted.
• Is the music that is already stored on the USB HDD backed up?
After registering a USB HDD for backup, back up data.
• Do I need to always have a USB HDD for backup use connected?
No. Each time you connect it, any music that has been added is backed up.
• What happens if I rename the music file?
Two musics before and after renaming will be backed up.
Delete the music before renaming in the USB HDD for backup.
Connect the USB HDD used for backup.
* Please use USB HDD that has the same capacity as this unit, or larger.
A USB HDD for backup is registered as one for backup use, and any data on it will be deleted.
So that you do not make a mistake and lose any important data, please only connect one USB HDD with this operation.
Tap [USB DEVICE SETTINGS].
Tap [Registration of the device for backup], and tap [NEXT].
Read the Caution items, and tap [REGISTRATION].
Tap [Yes].
Please wait until the USB HDD is registered.
Confirm that the message [Succeeded to register the device for backup.] is displayed.
This completes the operation. The USB HDD has been registered as one for backup use.
From now, the music will be backed up on the USB HDD.
Please see Removing the USB HDD.
If you reconnect a USB HDD for backup to this unit, it automatically starts backing up music.
If you do not want to always connect a USB HDD for backup, we recommend that you connect it occasionally to back up your music.
If you repeatedly add and remove music, the capacity of the USB HDD for backup will be reduced.
Please see Saving Audio Files from a PC, and delete any unwanted music in bkup folder.
When the USB HDD for backup is full, the front indicator lights up in red, and you will not be able to backup to it any more.
Tap [USB DEVICE SETTINGS].
Tap [Restoration of backup data], and Tap [NEXT].
Read the Caution items, and tap [RESTORE].
Tap [Yes].
Start restoring Music, and the front indicator blinks.
Do not remove the USB HDD while the indicator is blinking.
Confirm that the front indicator is lit.
Remove the USB HDD (for backup).
Please remove the USB HDD (for backup) once and then connect the USB HDD (for backup) again.
The musics are now restored.
Update the firmware and keep the Soundgenic up-to-date.
There are two ways of updating.
Update with automatic update function
You can check on "Internet" in [SYSTEM INFORMATION] of the Soundgenic setting screen as to whether it is connected to the Internet.
Local playlists etc of fidata Music Server may become strange.
The local playlist got wrong (the tune name is different from the actual tune).
In situations where you can update the Soundgenic, the indicator will lit orange.
If you turn off the Soundgenic in that state, Soundgenic will be updated to the latest state.
Tap [FIRMWARE UPDATE].
Tap [UPDATE].
This unit is the latest version.
There is no need to perform this procedure.
Tap [Yes].
Update begins and the indicator is blinking orange.
* This unit restart before and after updating. Therefore, the indicator will be blinking green before and after blinking orange.
Do not turn off the power while the indicator is blinking.
Confirm that the lamp is lit.
This completes the update.
This is displayed if you click in the HOME.
It shows various pieces of information about this unit such as its free space.
Numbers 1 - 3 are attached in the order in which this unit recognizes USB HDD (for share).
This number will be maintained until you remove the USB HDD (for share) and turn off this unit.
Displays the status of the backup function.
| Off | [AUTO BACKUP] (SYSTEM SETTINGS) is off. |
|---|---|
| Running | A USB HDD for backup is connected, and the system is in a state where backup is possible. |
| Running (currently backing up) |
Music is being backed up to a USB HDD for backup. |
| Unconnected | A USB HDD for backup is not connected. |
| Stopping |
A USB HDD for backup is connected, but is not being used. • It is not a USB HDD for backup that is registered in this unit. • After the USB HDD for backup was registered, this unit was formatted / initialized. |
| Unknown | An unknown error occurred in the backup. Operation has become unstable for some reason. Please remove the USB HDD for backup and reboot this unit. ⇒ Removing the USB HDD |
| Error |
An error occurred in the backup. • There is not enough space on the USB HDD for backup. • A USB HDD for backup is not correctly connected. |
You can apply various settings to this unit.
Click the [+] symbol to see a detailed description of each item.
When it is set to [On], when this unit shuts down or reboots and there is a firmware update, it will automatically update to the latest firmware.
* This unit must be connected to the Internet for this function.
* This item is currently invalid. If you want to obtain new firmware, please contact your dealer or distributor. (Certified Distributors)
Set the operation mode during USB-DAC / LAN DAC connection.
In OpenHome mode, even if you stop the control app, it can be the play of the playlist.
OpenHome mode is available in the corresponding control app.
If you want to use the unsupported control app to OpenHome, please set the DMR.
Depending on the USB-DAC / LAN DAC to be connected, the beginning of the music contents may not be played.
This function can be played correctly from the beginning of the music contents by setting the silent playing time.
* If your USB-DAC / LAN DAC is the validated model, setting [Auto] sets the optimum value.
Sets the output format when playing DSD content with the connected USB-DAC / LAN DAC.
Normally, please keep [Direct DSD / DoP (Auto)].
* In LAN DAC, even if [Direct DSD / DoP (Auto)] or [DoP] is set, it is treated as [Direct DSD].
If this specifies is set to [Enable], content can be played from the LAN DAC that support Diretta on the same network as the Soundgenic.
When this specifies is set to [Enable], DoPWAV converted from DSD to WAV format can be distributed from the Soundgenic.
You can specify the audio device to play back songs. Also, you can play back songs in the Web browser and download them.
* You can play back or download songs depending on the contents.
This is the audio server, and media other than music are disabled.
* This is the audio server, and videos and photos are not supported.
This folder stores the streaming songs.
* You cannot change or add folders.
You can set a streaming media type.
• Default
Music
Set a folder name that stores music data of Compilation Album.
• Default
Compilations,Sampler
Take the following steps.
1 Check the folder name that stores music data of Compilation Album.
2 In the Entry field of Compilation Folders, enter the folder name that you checked in Step 1 preceded by a comma (,).
3 Update the settings by selecting [Save Changes].
4 Click [Rescan Content Folders] of Server Maintenance.
5 Make sure that songs are correctly displayed.
Set a folder or folders to be ignored during contents scan.
• Default
AppleDouble, AppleDB, AppleDesktop, TemporaryItems, .fseventsd, .Spotlight-V100, .Trashes, .Trash, RECYCLED, RECYCLER, RECYCLE.BIN
Take the following steps.
1 Check the folder name that contains the unintended data that is displayed.
2 In the Entry field of Ignore directories, enter the folder name that you checked in Step 1 preceded by a comma (,).
3 Update the settings by selecting [Save Changes].
4 Click [Rescan Content Folders] of Server Maintenance.
5 Make sure that songs are correctly displayed.
Set the folder configuration during playback. When you register an audio device (Media Receiver), the type you have set here is selected.
• Mobile
The folder configuration suitable for the mobile terminal.
• Classic Media Navigation
The folder configuration suitable for a small music library.
• iPod-like
The folder configuration suitable for users who wish to use the iPod-like configuration.
• By Folder
The folder configuration suitable for users who organise music folders to their liking.
• Advanced Media Navigation
The folder configuration suitable for a large music library.
The following folder configuration is set for each type. They are usually displayed in the following order.
However, it may differ according to the audio device you use.
| Mobile | Classic Media Navigation |
iPod-like | By Folder | Advanced Media Navigation |
|
|---|---|---|---|---|---|
| Folder | - | ◯ | - | ◯ | ◯ |
| CD(When music CD is inserted) | ◯ | ◯ | ◯ | ◯ | ◯ |
| Recently added songs |
◯ | ◯ | ◯ | ◯ | ◯ |
| Artists | ◯ | ◯ | ◯ | - | ◯ |
| Artists Index |
- | - | - | - | ◯ |
| Album | ◯ | ◯ | ◯ | - | ◯ |
| Album Index |
◯ | ◯ | ◯ | ◯ | ◯ |
| Composer | - | - | ◯ | - | ◯ |
| Format | ◯ | ◯ | ◯ | ◯ | ◯ |
| Date | ◯ | ◯ | ◯ | ◯ | ◯ |
| Artists/Album | - | - | - | - | ◯ |
| Genre/Album | - | - | - | - | ◯ |
| Genre/Songs | ◯ | ◯ | ◯ | - | ◯ |
| Playlist | ◯ | ◯ | ◯ | - | ◯ |
| Personal rating |
- | - | - | - | ◯ |
| All music | ◯ | ◯ | ◯ | ◯ | ◯ |
| Title index | ◯ | ◯ | ◯ | ◯ | ◯ |
Set the type for each audio device by selecting: Media Receivers in Security > more > Navigation Type.
You can change "Pre-defined trees" or you can create your own navigation tree type.
1. Select a node such as "Favorites".
* By tapping the "Pre-defined trees" item, you can check the nodes displayed by them.
2. Enter the name of my tree.
3. Tap [Save my tree].
4. Tap [Save changes].
My tree is now saved.
My tree is also displayed in "Navigation tree" and "Navigation type of media receiver".
Sets the Aggregation function.
You can handle the contents of another media server as if it is stored on the network audio server.
This function is useful if you are using more than one of our network audio servers.
(It is not guaranteed that all media servers will be detected.)
If another new media server is detected, select an operation to be set automatically.
• Ignore (Default)
A newly detected media server is not aggregated.
• Aggregate
The contents of a newly detected media server can be handled as if they are stored on the network audio server.
• AutoCopy
The contents of a newly detected media server are copied onto the network audio server.
* This is useful if you wish to aggregate contents of media servers that may not be available all the time on the network, such as smartphones.
* The contents are copied from the "contents" folder to the "mirrored" folder.
If you edit or delete the automatically copied contents, the contents of the network audio server are handled as follows.*
| Contents on the media server |
Edit | Overwritten by the edited contents, and copied. |
|---|---|---|
| Delete | The contents on the network audio server remain. | |
| Contents on the network audio server |
Edit | Overwritten by the media server contents, and copied. The edited contents are lost. |
| Delete | The contents are copied again. |
* The changes are reflected at certain times such as when the network audio server is restarted.
Sets an audio device (Media Receiver) registered by the Twonky Server.
The Twonky Server automatically detects and registers audio devices.
• Enable sharing for new media receivers automatically
When the Twonky Server automatically registers an audio device, select the method of music streaming.
If unchecked, detected new audio devices will be registered as if they will not be delivered.
• Audio devices
Display registered audio device. We will deliver music only to checked audio devices.
● MAC、IP
This is the MAC address and IP address of the audio device.
● Media Receiver Type
Select an audio device type.
(The default is determined and set by the Twonky Server automatically.)
• Reset List
All registered audio devices are deleted from the list.
After that, the existing audio devices are detected again and registered automatically.
Select a language to be used in the setting window and the Navigation Tree (folder configuration during playback).
* Note that the music information etc. is not translated.
• Restart Server
Restarts the Twonky Server.
• Rescan Content Folders
Updates the audio information.
• Reset to Defaults
Returns the Twonky Server to the default settings.
• Clear Cache
Deletes the cache data that has been assigned automatically by the Twonky Server.
Click the [+] symbol to see a detailed description of each item.
Specify a method to start importing tracks on a music CD.
Auto
Automatically starts importing when you insert a music CD into the drive.
Manual
Starts importing when you insert a music CD into the drive and press the POWER button.
Off
Does not import tracks on a music CD.
* When [Auto] is selected, the CD transport function is not available. (This is because importing starts.)
* When [Manual] is selected, you cannot perform USB-DAC / LAN DAC play operations using the POWER button while a music CD or data DVD/BD is in the CD/DVD/BD drive connected to this product.
Configure the AccurateRip setting.
The rip log is displayed as shown below.
Example: When the verification of the second track in the album, "Album Name", succeeds with AccurateRip, the rip log is displayed as shown below.
#02 Album Name OK 7f08bf02(123)
• Result
OK: Imports data with the matched contents when the AccurateRip result matches another person’s result (CRC value).
NOT ACCURATE: Retries verification up to three times when the AccurateRip result does not match another person’s result.
When the same result is obtained for all, its data is imported.
ABORT: Does not import data when the system stopped the import process because it failed to read data due to damage or dirt on the disc surface.
SKIP: Imports the current data when the collation with AccurateRip failed because this product is not connected to the Internet or for other reasons.
• CRC value
Used to collate the importing result. AccurateRip collates this value for importing.
• Confidence value
When the results match, the another person's matching count is displayed. As the confidence value is greater, the reliability is higher.
Set the retry process to re-read data when an error occurs during reading.
Specify the speed to read a music CD.
Normal
Reads a music CD at the slowest speed of the CD/DVD/BD drive.
High Speed
Reads a music CD at the maximum speed of the CD/DVD/BD drive.
Configure settings for the imported music data.
Specify the offset value depending on the characteristics of the CD/DVD/BD drive.
Auto
Obtains the offset value from the online database.
Manual
Manually enter the offset value.
Specify how to use the Gracenote-supplied information database for music CD.
Retrieve None
Stops importing tracks on a music CD when there is no music information.
This prevents a music CD from being imported with no music information assigned.
Retrieve
Imports a music CD without assigning meta information when there is no music information.
Puts this unit back into the state it was in at the time of purchase.
Returns all the settings of this unit to the default value, and deletes data on this unit.
When this is set to [On], the data in this unit is completely deleted so that it cannot be restored.
| Model | Normal initialization | Regular format |
|---|---|---|
| 2TB / HDD | About 2 minutes | About 5 hours |
Reset current firmware to factory firmware.
The saved data (audio files etc.) will not be erased.
To avoid updating the firmware, set the AUTO UPDATE in SYSTEM SETTINGS to off as soon as the firmware is initialized.
Update the firmware (internal software) of this unit, and keep it up to date.
This unit must be connected to the Internet.
Do not stop power supply by unplugging the AC adapter or switch off the power tap.
The front indicator is lit in orange.
The front indicator is lit in red.
The power does not come on with fidata Music App's [Power on]
The power does not turn off (The frontindicator is blinking).
Please turn off the power supply to this unit, and then turn it on again.
This firmware/software for this unit will be updated to the latest version.
Please see Saving Audio Files from a PC, access the USB HDD for backup from a computer, and delete any unnecessary files.
Please confirm whether the USB HDD for backup is correctly connected.
If it is connected correctly, there is a possibility that the USB HDD has failed.
In addition, please use this unit to register the USB HDD for backup when connecting it for the first time.
Remove a USB HDD if it is connected.
Then, please turn off the power supply to this unit, and then turn it on again.
After the start-up process has completed, if the lamp is lit in red then a problem has occurred with the built-in disk.
Please see the "Conformity Information and Warranty", and contact our Support.
This product does not support [Power on] by fidata Music App.
If a new version is detected, this unit will be updated automatically when you turn off the power.
The update may take more than 10 minutes.
Do not unplug the power cable or turn off the power strip until the lamp turns off.
If a new version is detected, this unit will be updated automatically when you turn off the power.
The update may take more than 10 minutes.
Do not unplug the power cable or turn off the power strip until the lamp turns off.
If you check [Regular format of internal disk] in [SYSTEM INITIALIZATION] on the setting screen and execute it, it will take a considerable time for the data to erase completely (SYSTEM INITIALIZATION).
Do not unplug the power cable or turn off the power strip until the lamp turns off.
This unit does not appear in App etc.
I want to put this unit back into the state it was in at the time of purchase.
Please connect the computer or smart device to the same Wi-Fi router as this unit.
By initializing the system, you can return all the settings of this unit to those at the time of purchase, and delete data on this unit.
Tap [SYSTEM INITIALIZATION].
Run it.
All data including songs in Soundgenic will be deleted and all settings will be restored to the state at the time of purchase.
When this is set to [On], the data in this unit is completely deleted so that it cannot be restored.
Data will be written to all parts of the built-in disk, and so it will take a very long time.
(For a guide to the time required, please see SYSTEM INITIALIZATION.)
For details, please visit our web page (in English).
https://www.iodata.jp/fidata/en/support/#download
This unit does not appear in App etc.
I want to know the folders in the contents folder.
I want to know about folders other than contents.
Does not recognize USB CD/DVD/BD drive.
Three USB HDD (for share) can not be used.
I can not copy CD ripped contents.
Please see here.
Please see here.
Select [Removal of the USB device] in [USB DEVICE SETTINGS] on the SET screen.
| Folders | Description |
|---|---|
| CD Library | Musics that ripped music CDs will be saved. (It will be created when CD ripping function is used.) |
| import | Music saved from USB HDD etc will be saved. (It will be created when songs are imported from USB HDD etc.) |
| uploaded | Musics uploaded to Soundgenic by operating another DLNA device will be saved. |
| playlists | The playlist (m3u) exported from the local playlist is saved. |
| Folders | Description |
|---|---|
| usb 1~3 | This folder is in USB HDD (for share). This folder is read-only in order to protect the music (you cannot write to it or delete files in it). Please connect USB HDD to PC and add / delete musics. |
| bkup | This folder is in USB HDD (for backup). |
Please wait.
If you are using fidata Music App, you can check the import status.
It can be set not to retry by the collation result of AccurateRip.
• When setting from the setting screen of Soundgenic.
2) [USB CD/DVD/BD DRIVE SETTINGS] → Set [Retry Process] to "Off".
• When setting from fidata Music App.
1) Open CD ripping screen with fidata Music App.
2) [Options] → Set [Retry] to "Disable".
• If you can connect a USB CD/DVD/BD drive to a power outlet, try connecting it.
• If you are using a USB hub, try connecting USB CD/DVD/BD drive directly to the Soundgenic.
If it works, there is a problem with the USB hub.
Please try Keeping the Firmware of the Soundgenic up to Date.
The artwork "Folder.jpg" provided by Gracenote can not be copied (moved) for protection.
For example, in the case of Windows, "File Access Denied" screen about Folder.jpg is displayed.
In this case, you can copy or move CD ripped contents by clicking [Skip].
* The copied (moved) content does not include artwork (Folder.jpg).
* When you move contents, Folder.jpg and folders containing it remain in their original locations.
Delete them if you do not need them.
If you display horizontally on your smartphone (landscape mode), some items may not be displayed.
In that case, please display in portrait (portrait mode).
* Landscape mode is for tablets. It does not guarantee the operation on smartphones.
Please see Transfer Audio Files to a DAP.
* WALKMAN is registered trademarks of Sony Corporation.
I cannot play music when I am using this unit as an audio player.
Musics don't play from the beginning when I am using this unit as an audio player.
Artwork is incorrect / not displayed.
The next tune is not displayed in fidata Music App.
When starting fidata Music App, a server different from the one at the time of last time is opened.
When you tap the shortcut with fidata Music App, the category of different server is displayed.
Soundgenic is not displayed in the control application.
Renderer does not appear in fidata Music App.
I can not register music with fidata Music App.
Playback stops when playing with fidata Music App.
The order of tunes in fidata Music App is different from the track order of music CD.
Music does not appear in server pane of fidata Music App.
The local playlist got wrong (the tune name is different from the actual tune).
I want to enlarge the operation icon of fidata Music App.
I got a call to a device using fidata Music App but the play does not stop. [Android version only]
Some items in the fidata Music App are missing.
There is no sound when played back on a DoPWAV compatible network audio player.
Please open the Settings screen, and Switch [Network Renderer Setting] in [System Setting].
Please open the Settings screen, and switch [USB PERFECT PLAY] in [System Setting].
By setting silent playback time between songs, it prevents the beginning of the song from being cut off.
Please set it so as to be optimal for your environment other than [Auto].
* [USB PERFECT PLAY] is set to [Auto] by default.
In the [Auto] setting, the optimum value is automatically set when using verified USB-DAC / LAN DAC.
Please try the following actions.
Tap .
Tap [fidata Music App setting ].
Tap [Clear the artwork cache].
A confirmation message is displayed. Tap [Clear].
⇒ You have now cleared the artwork cache. Check if the problem is resolved.
(If the number of tunes is large, it takes time for all artwork to be displayed.)
Please try the following actions.
Tap [MEDIA SERVER SETTINGS].
Tap [Security].
Set the [Media Receiver Type] of an audio device that does not show artwork to [Generic Media Receiver (BC)].
The list shows the [MAC] (MAC address), [IP] (IP address), and [Friendly Name] of the audio device. Please confirm these details of the audio device.
You can confirm the MAC address on a sticker that is attached to the audio device or on its Settings screen.
Tap [Save Changes].
If you want to display the next tune, please display tune information large.
Please disable shuffle playback.
When starting fidata Music App, the hierarchy displayed at the end of the selected server is displayed.
1) Start the fidata Music App.
2) Tap on the left edge.
3) Select server.
⇒ The selected server will be "selected server".
When a shortcut is tapped, the corresponding category of the Selected Server is displayed.
⇒ Choose a selected server.
Please check the power and connections of Soundgenic.
Please restart the control application.
Please force close an app referring to here and then re-launch the app.
Please check the power and connections of network audio player or USB-DAC.
Please restart fidata Music App.
Please see I can not register tune.
• Playback with OpenHome compatible equipment.
• When playbacking with USB-DAC / LAN DAC connected to Soundgenic, the operation as a player may be set to [DMR]. Open the setting screen and set [System settings] → [Network Renderer] to [OpenHome].
• Please try the following operation when playing on DMR compatible equipment.
Tap .
Tap [fidata Music App settings].
Enable [Prevent sleep on tune information screen].
Tap [Close].
Please see Play with fidata Music App, and play back in a state in which song information and artwork are displayed largely (tune information screen display).
⇒ While playing in the tune information screen display, your smart device. will not sleep.
* When playing with DMR, hold the playlist on the control application side.
Therefore, when the control application stops at sleep of the smart device, playback also stops.
Please open tunes in order of Soundgenic → Music → album and check it.
→
→
Please see Edit the meta information of music files, and please check the meta information of the song.
It may take time to build the database of the media server, for example when saving a large number of audio files.
Please wait for a while, please check again.
• If you can connect the USB-DAC to a power outlet, please connect it.
• If you are using a USB hub, try connecting USB-DAC directly to the Soundgenic.
If it works, there is a problem with the USB hub.
• Please check the compatibility of USB-DAC.
• Please check the power supply of LAN DAC.
• Please check the network connection of Soundgenic and LAN DAC.
• Soundgenic cannot use LAN DAC and USB-DAC together. If both LAN DAC and USB-DAC are connected to Soundgenic, USB-DAC has priority.
• Soundgenic can use one LAN DAC. Soundgenic cannot select the LAN DAC to be used. Therefore, do not install multiple LAN DACs.
• Please check the compatibility of LAN DAC.
When the database of the media server is rebuilt, linked tunes in local playlists may be wrong. Please recreate the local playlist again.
Please make a playlist (m3u) at the timing when the database is likely to be rebuilt, such as before Soundgenic is up to date.
⇒ Make local playlist a playlist (m3u)
Then you can use the playlist (m3u) as a backup of the local playlist.
Arrange shortcuts to be satisfied.
(Shortcuts are arranged in order of use from the left.)
Tap .
Tap [fidata Music App settings].
Enable [Lock the shortcut].
Tap [Close].
You can enlarge the operation icon with the following operations.
Tap .
Tap [fidata Music App settings].
Enable [Display large].
Tap [Close].
You can enlarge items on the screen with Android settings.
Open [Settings] of Android.
Change display size.
The above screen is from Nexus 9.
In Nexus 9, you can change the display size with the setting [Display] → [Display size].
In the settings of Android, you can also change the font size.
In Nexus 9, you can change the font size with the setting "Display" → "Font size".
If you change the display size, 2 pane may not be displayed.
In such a case, adjust the display size value.
You can pause playback when you receive a call with the following operations.
Tap .
Tap [fidata Music App settings].
Enable [Pause at incoming call].
When the message like "Allow fidata Music App to make and manage phone calls?" Is displayed, tap [Allow].
Please see here.
If the network audio digital volume is other than the maximum, there may be no sound even when played in DoPWAV format.
Reduce the volume of the analog part such as an amplifier connected to the network audio player to the minimum.
Set the volume of the network audio player to the maximum.
Gradually increase the volume that was throttled in step 1 and check that the playback sound is output.
• Occurrence condition
No renderer (player) was found in the same network as the smart device.
• What to do
• Check that the network configuration is correct (eg whether the renderer and the smart device are connected to the same router).
• Turn on the smart device airplane mode and wait 10 seconds before releasing.
• Restart fidata Music App.
• Restart the renderer.
• If you can not find an audio device connected to fidata / Soundgenic, please review the connection to the USB port.
• Occurrence condition
No server (DMS) was found in the same network as the smart device.
• What to do
• Check that the network configuration is correct (eg whether the server and the smart device are connected to the same router).
• Turn on the smart device airplane mode and wait 10 seconds before releasing.
• Restart fidata Music App.
• Restart the server.
• Occurrence condition
This is a confirmation message displayed when trying to add tunes to the playlist when Registration rules when tapping tunes is [new].
• What to do
-
• Occurrence condition
This is a confirmation message displayed when tapping the [delete] button at the top right of the playlist pane.
• What to do
-
• Occurrence condition
This is a confirmation message displayed that there are many target tunes (more than 256 tunes) when tapping [Transfer to USB] from the server pane menu.
• What to do
-
• Occurrence condition
This is a confirmation message displayed when a file with the same name exists in the USB transfer destination.
• What to do
-
• Occurrence condition
It is displayed when USB transfer fails.
The message shows the name of the file that failed to be transferred. If multiple files get an error, one of them will be displayed.
• What to do
• Wait for several minutes.
• Pull out the USB device, then connect it again.
• Restart fidata / Soundgenic.
• Occurrence condition
It is displayed when the number of tunes to be subject to USB transfer exceeds the limit.
• What to do
• The limit of the number of tunes that can be transferred at once can be changed from [fidata Music App setting] - [Music registration settings] - [Maximum number of tunes] (maximum 9999).
• Reduce the number of target tunes to less than the limit and transfer them to USB.
• Occurrence condition
This message is displayed when USB transfer takes too much time for processing.
The number of tunes subject to USB transfer affects processing time.
• What to do
• The time before timeout can be changed from [fidata Music App setting] - [Music registration settings] - [Time before timeout (seconds)] (maximum 999).
• Reduce the number of target tunes and then transfer them to USB.
• Occurrence condition
This message is displayed when there is no target tune during USB transfer.
• What to do
If tune is not included, USB transfer is not possible.
• Occurrence condition
It is displayed when multiple USB devices are connected to fidata / Soundgenic.
• What to do
-
• Occurrence condition
It is displayed when an error other than the above occurs during USB transfer.
ex. Failed to acquire server information
• What to do
• Wait for several minutes.
• Pull out the USB device, then connect it again.
• Restart fidata / Soundgenic.
• Occurrence condition
This is a confirmation message displayed that there are many target tunes (more than 256 tunes) when tapping [Collective registration in the playlist] from the server pane menu.
• What to do
-
• Occurrence condition
It is displayed when the number of tunes to be subject to collective registration in the playlist exceeds the limit.
• What to do
• The limit of the number of tunes that can be registrated at once can be changed from [fidata Music App setting] - [Music registration settings] - [Maximum number of tunes] (maximum 9999).
• Reduce the number of target tunes to less than the limit and then [Collective registration in the playlist].
• Occurrence condition
This message is displayed if it takes too much time to process collective playlist registration.
The number of tunes subject to collective playlist registration affects processing time.
• What to do
• The time before timeout can be changed from [fidata Music App setting] - [Music registration settings] - [Time before timeout (seconds)] (maximum 999).
• Reduce the number of target tunes and then [Collective registration in the playlist].
• Occurrence condition
It is displayed when there is no target tune at the time of collective registration in the playlist.
• What to do
If tune is not included, collective registration in the playlist is not possible.
• Occurrence condition
It is displayed when an error other than the above occurs during collective playlist registration.
• What to do
• Wait for several minutes.
• Restart fidata / Soundgenic.
• Occurrence condition
It is displayed when fidata Music App can not acquire CD ripping status from fidata / Soundgenic.
• What to do
If the error code is 700, update the firmware of fidata / Soundgenic.
• Occurrence condition
It is displayed when fidata Music App can not acquire CD ripping setting information from fidata / Soundgenic.
• What to do
If the error code is 700, update the firmware of fidata / Soundgenic.
• Occurrence condition
It is displayed when update of CD ripping setting information fails.
The ripping process is canceled.
• What to do
If the error code is 700, update the firmware of fidata / Soundgenic.
• Occurrence condition
It is displayed when fidata Music App can not acquire the meta information of the music CD.
• What to do
After inserting the music CD, wait for a while and open the CD ripping screen.
Also, if the error code is 700, update the firmware of fidata / Soundgenic.
• Occurrence condition
It is displayed when update of the meta information fails.
The ripping process is canceled.
• What to do
If the error code is 700, update the firmware of fidata / Soundgenic.
• Occurrence condition
It is displayed when fidata Music App can not acquire the artwork of the music CD from fidata / Soundgenic.
• What to do
If the error code is 700, update the firmware of fidata / Soundgenic.
• Occurrence condition
It is displayed when update of the artwork fails.
The ripping process is canceled.
• What to do
If the error code is 700, update the firmware of fidata / Soundgenic.
• Occurrence condition
It is displayed when ripping start processing fails.
• What to do
If the error code is 700, update the firmware of fidata / Soundgenic.
• Occurrence condition
It is displayed when ripping cancellation processing fails.
• What to do
If the error code is 700, update the firmware of fidata / Soundgenic.
• Occurrence condition
It is displayed when file copying process fails.
• What to do
• Wait for several minutes.
• The target file or directory may have already been deleted. You can check it by going back one level back and opening the current location again.
• Restart fidata / Soundgenic.
• Occurrence condition
It is displayed when file moving process fails.
• What to do
• Wait for several minutes.
• The target file or directory may have already been deleted. You can check it by going back one level back and opening the current location again.
• Restart fidata / Soundgenic.
• Occurrence condition
It is displayed when file deletion processing fails.
• What to do
• Wait for several minutes.
• The target file or directory may have already been deleted. You can check it by going back one level back and opening the current location again.
• Restart fidata / Soundgenic.
• Occurrence condition
It is displayed when file name change processing fails.
• What to do
• Wait for several minutes.
• The target file or directory may have already been deleted. You can check it by going back one level back and opening the current location again.
• Restart fidata / Soundgenic.
• If the error code is 700, update the firmware of fidata / Soundgenic.
• Occurrence condition
It is displayed when folder creation processing fails.
• What to do
• Wait for several minutes.
• The target file or directory may have already been deleted. You can check it by going back one level back and opening the current location again.
• Restart fidata / Soundgenic.
• If the error code is 700, update the firmware of fidata / Soundgenic.
• Occurrence condition
It is displayed when the meta data updating (tagEdit) process fails.
• What to do
• Wait for several minutes.
• The target file or directory may have already been deleted. You can check it by going back one level back and opening the current location again.
• Restart fidata / Soundgenic.
• If the error code is 700, update the firmware of fidata / Soundgenic.
• Occurrence condition
It is displayed when the meta data updating (tagEdit) process takes more than 30 seconds.
• What to do
• Wait for several minutes.
• Restart fidata / Soundgenic.
• Occurrence condition
It is displayed when the meta data acquisition processing fails.
• What to do
• Wait for several minutes.
• The target file may have already been deleted. You can check it by going back one level back and opening the current location again.
• Restart fidata / Soundgenic.
• If the error code is 700, update the firmware of fidata / Soundgenic.
• Occurrence condition
This is a confirmation message displayed when tapping [Change] on the meta information screen while targeting multiple files.
• What to do
-
* Meta information updates only the changed items.
• Occurrence condition
It is displayed when saving local playlist fails.
• What to do
• Restart the application.
· If this error occurs again, check the free space on the smart device.
• Occurrence condition
This is a confirmation message displayed when there is a local playlist of the same name.
• What to do
-
• Occurrence condition
It is displayed when the selected server is not specified or can not be found in the same network.
• What to do
The target of [Search by specifying criteria] is the selected server.
Specify the selected server and try the search again.
• Occurrence condition
During making playlist (m3u), it is displayed when the file name contains characters that can not be used.
• What to do
Delete characters that can not be used from the file name.
• Occurrence condition
During making playlist (m3u), it is displayed when there is no tune of the upload destination server in the local playlist.
• What to do
-
• Occurrence condition
During making playlist (m3u), it is displayed when can not find any fidata / Soundgenic on the same network.
• What to do
Check that fidata / Soundgenic is displayed in the server list.
• Occurrence condition
During making playlist (m3u), it is displayed when a playlist with the same name exists on the upload destination server.
• What to do
Change the file name of the playlist.
• Occurrence condition
During making playlist (m3u), it is displayed when the upload size limit has been exceeded.
• What to do
Reduce the number of tunes in the local playlist.
• Occurrence condition
During making playlist (m3u), it is displayed when an error other than the above occurs.
• What to do
Restart fidata / Soundgenic.
• Occurrence condition
It is displayed when [fidata Music App setting] - [Media server] - [Media server] is enabled, and access to the storage is not permitted.
(If permission screen can be displayed, there will be displayed.)
• What to do
Tap [Settings] on the message screen to open the setting screen, and enable storage permission.
• Occurrence condition
It is displayed when [fidata Music App setting] - [Media server] - [Media server] is enabled, and access to the storage is not permitted.
(If permission screen can be displayed, there will be displayed.)
• What to do
Tap [Settings] on the message screen to open the setting screen, and enable media library permission.
• Occurrence condition
This is a confirmation message displayed when tapping [fidata Music App setting] - [Reset all settings].
• What to do
-
• Occurrence condition
It is displayed when login to the selected device fails on the Magical Finder screen.
• What to do
• Check the login password.
• Wait for several minutes, and login to the device again.
• Occurrence condition
It is displayed when device editing (IP setting) fails on the Magical Finder screen.
• What to do
Wait for several minutes, and start over from login.
• Occurrence condition
It is displayed when device editing (IP setting) suceeds on the Magical Finder screen.
• What to do
-
• Occurrence condition
Repeat setting of the renderer has been changed from other apps or devices.
• What to do
-
I will show you the method to view this manual at hand.
 Print All Pages (PC Only)
By clicking the above button, you can print the entire manual with the print function of the web browser.
However, manuals with many items have more pages and are not suitable for printing on the whole.
We recommend that you open the page you want to print and print only that page with the Web browser's print function.
* "Print All Pages" is a function that is only available for PCs.
Please see the following for the software license information used in this manual.


It refers to the network audio server chosen mainly for use.
Selecting the Selected Server affects the following operations.
• Tap the shortcut to display the corresponding category of the Selected Server.
• When launching fidata Music App, the hierarchy displayed at the end of the Selected Server is displayed.
• If the Selected Server is a fidata server, server status is displayed.
Reference: Choose a selected server
A playlist saved in fidata Music App.
Reference: Save Playlist [Local Playlist]
This is I-O DATA controller app. "fidata Music App" has released iOS / Android version.
Reference: 2.1. Install fidata Music App
Reference: 2.2. Initial activation of fidata Music App
This word from Pane that points to a window frame etc. It refers to a section divided by function in the application.
fidata Music App has "Server pane" which displays songs in the network audio server and "Play list pane" which displays songs of the play list registered in the renderer.
In addition, the file operation function also has two panes, and you can exchange music files between them.
On the tablet, both can be displayed.
On the smartphone, only one pane is displayed and can be switched by flick.
It is a function for playing back content. In the usage environment of Soundgenic, it refers to network audio player.
Also, if a USB-DAC is connected to Soundgenic, Soundgenic will also be treated as a network audio player (renderer).
In fidata Music App, you can choose the renderer to use in the lower right of the screen.
A portable digital audio player such as WALKMAN®.
Abbreviation for Digital Audio Player.
* WALKMAN is registered trademarks of Sony Corporation.